|
| Imperia
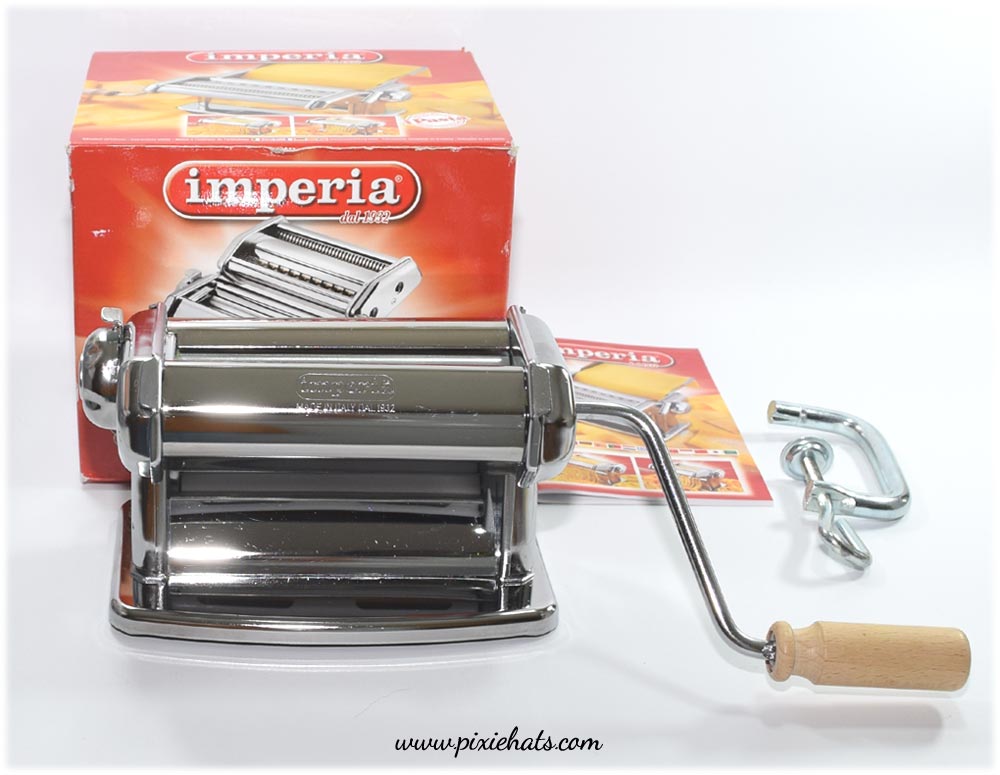
pasta making machine SP150 |
As sales of Pixiehats' charms
continue to grow, yay! So sadly had the 'clay conditioning' ache in my hands
and finger joints, not yay. With a forceful prod from a family member I finally
decided to change the direction of use for our pasta maker and have it turn
out much needed sheets of polymer clay instead
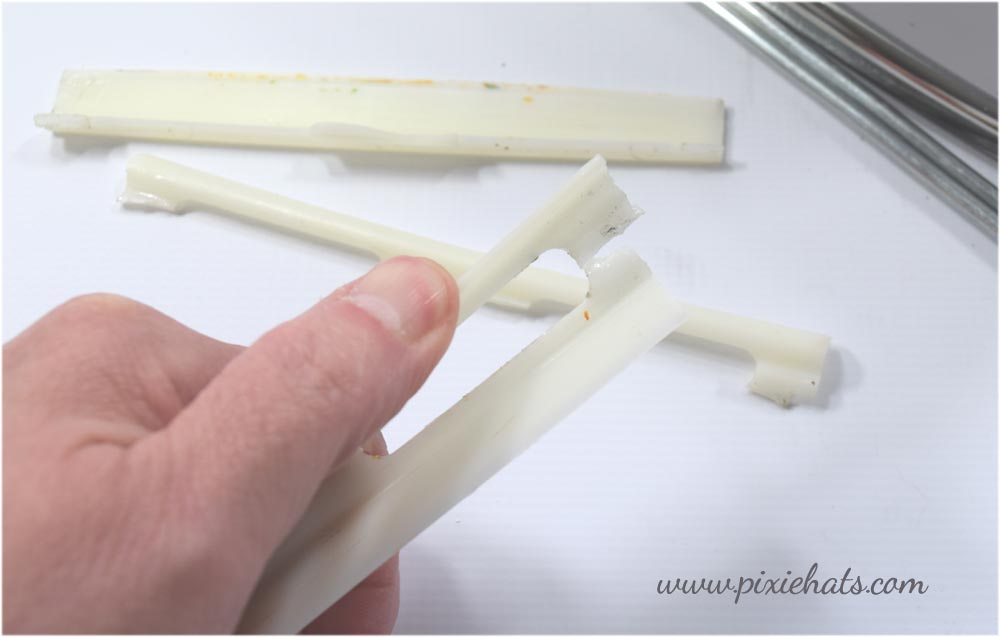
of the more usual pasta dough. However, turns out the machine had other
ideas when we discovered both scraper blades had broken, snapping at the
ends rendering it pretty much unusable, arghh :(
|
|
|
|
Broken
scraper blades from Imperia pasta machine model SP150
|
Being a consumable part of
the machine I genuinely thought finding replacement scraper blades would
be relatively easy and equally important, affordable.
This wasn't the case and for the following few months super glue was
the go-to alongside some strategic positioning of the clay.
I'm very pleased to say that eventually we managed to source a set
of new scrapers and relieved when, once fitted the machine was able to
beat down and flatten out a beautifully smooth sheet of clay.
Happily, that was all 4
years ago and the same blades are still going strong, I've even managed
to find a supplier so can offer them to kneaders in the same doughy or clay
bound situation! So ..
|
|
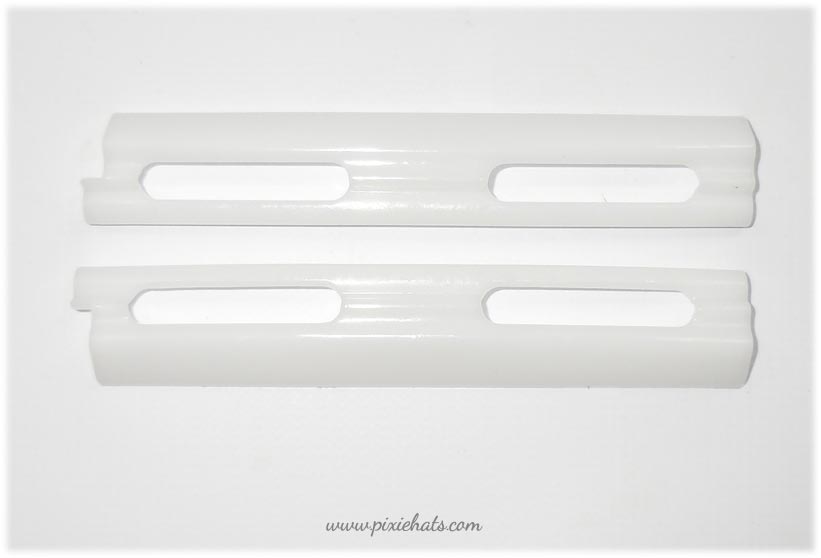
if you're
in the UK and would like to buy a set of 2 (grey) pasta machine
scrapers you can pay on this button:
CURRENTLY OUT OF STOCK
This page was last updated
on 8th May 2022
|
|
Which pasta machines do these scraper bades fit?
Whilst I don't have personal experience of these sheeter machines the
blades are listed as fitting the following models:
iPasta 100 162
Titania 180 190
Pasta Presto 230V 700
Pasta Presto 120V 720
Pasta Presto Manual 740
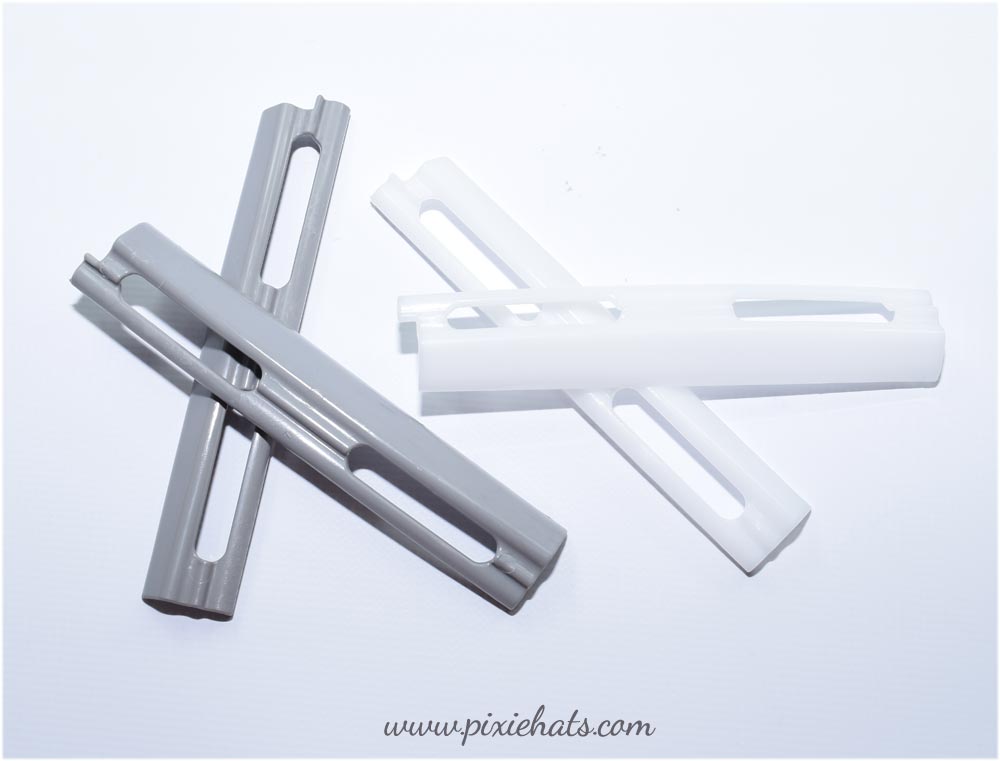
Each scraper measures 144mm long x 25mm width
Fitting the scraper blades
First time removing the pasta
machine's scraper blades can be quite daunting. I wasn't sure how to break
the machine down in order to get the blades out and then struggled to
fit the new scrapers - in their scarcity at the time, the fear of breaking
the new ones was real! But everything was good. The replacements, in
my opinion, are far more robust than the originals - they're made from
acetal
resin and have a stiff, flexibility that the older brittle plastic didn't
so they can be safely flexed upwards once the metal studs (found on the
machine's inner walls) have been captured by the ends of each scraper blade
and the support rods have been guided back through the channel/groove and
into the hole on the other side.
|
|
These are the maintenance
tools you'll need to remove and refit the Imperia pasta machine's scraper
blades:
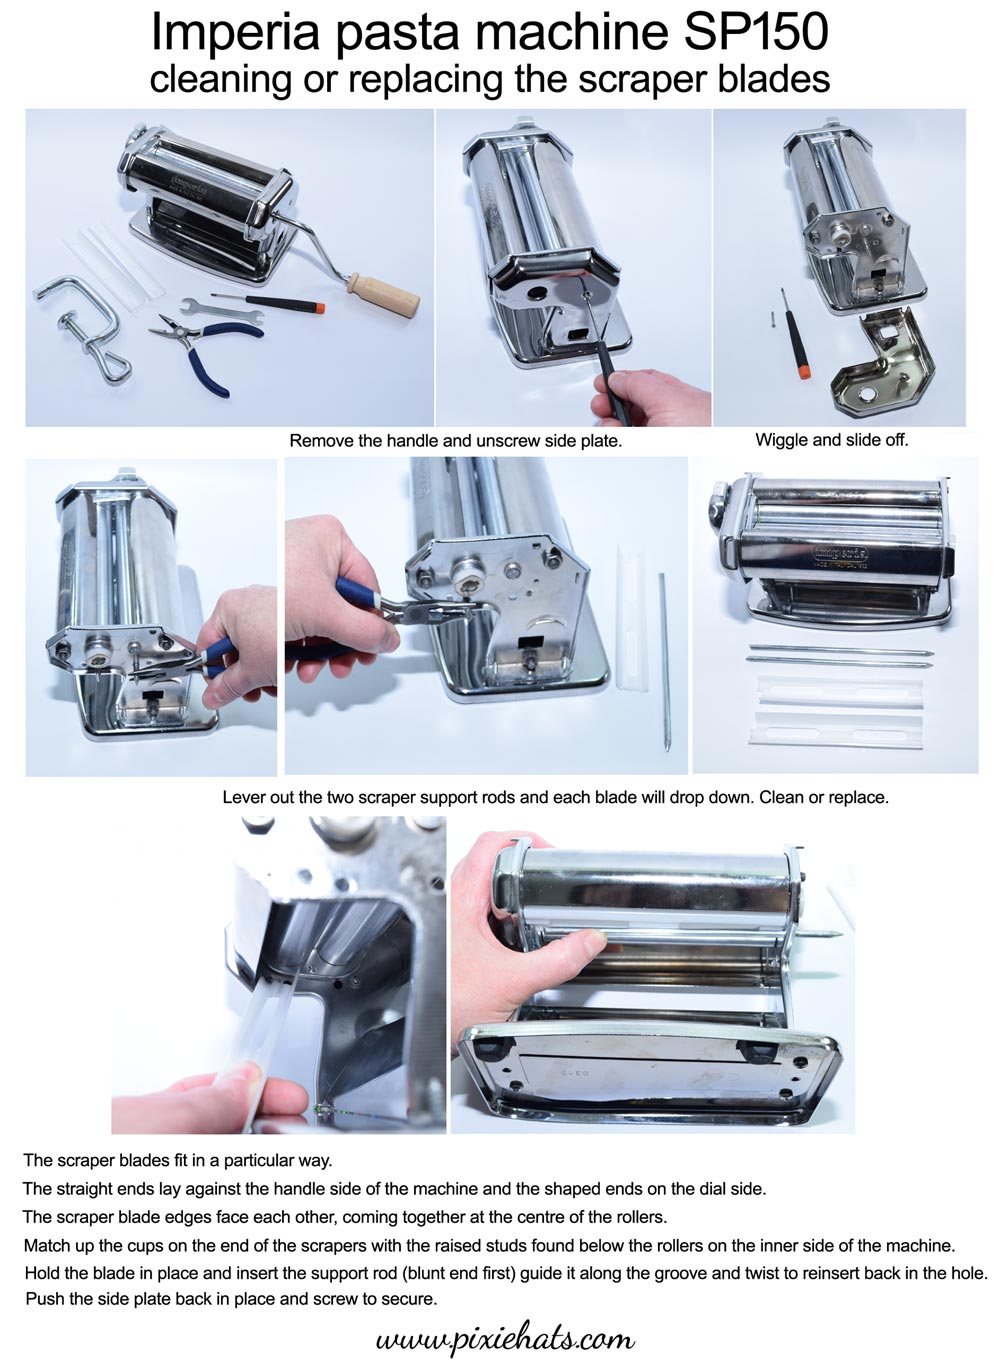
Scraper blade removal guide below:
Right click the image below to save it to your device. Left clicking
the image will take you to amazon.co.uk where you can buy a new
Imperia home pasta maker machine.
|
|
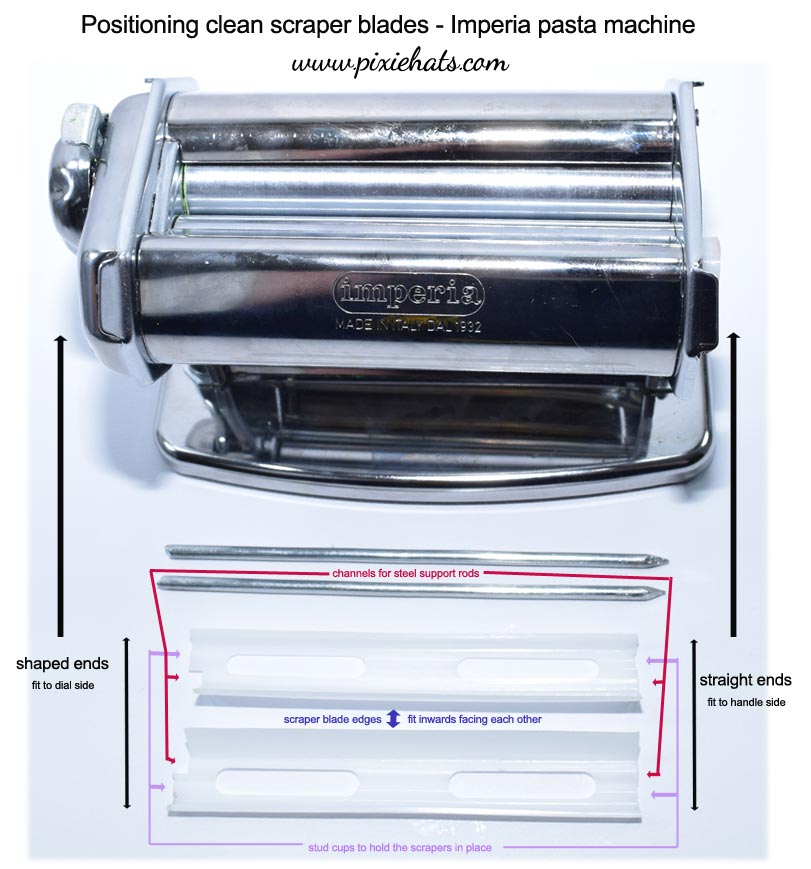
Get to know the scraper blades.
It truly helps to avoid a few problems if these pointers can be
remembered.
1. The blades have a set way of going in - both flat/straight ends need
to lay against the handle side and the shaped, cut out ends fit against
the dial side.
2. The cup or dip found on the ends of the scrapers are most important.
They must capture and 'hug' the raised metal studs found on the inner wall
of the machine so that once the rods are in place the tension keeps the blades
pressed snugly against the surface of the rollers.
|
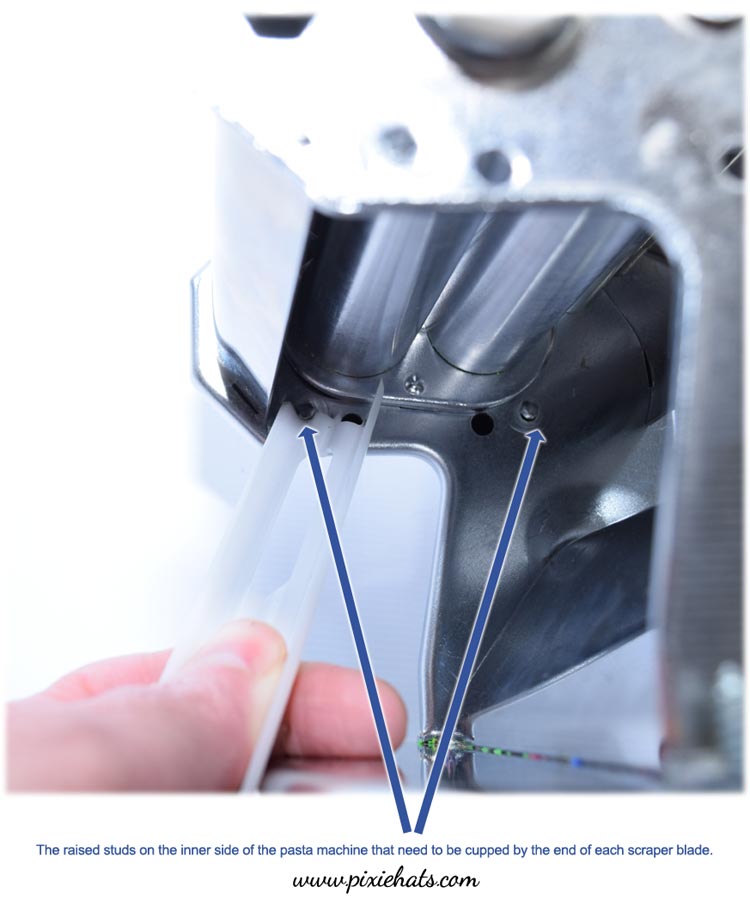
Identifying the raised metal studs that stick
out on the inner walls. The 'scooped' ends of each scraper need to cup
these studs in order to be in the correct position.
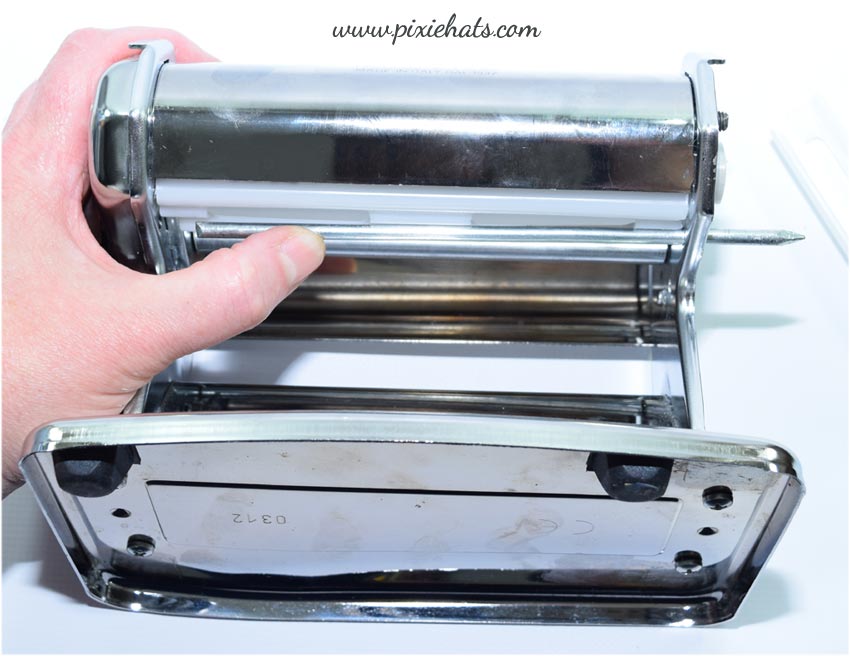
Guiding the support rods (blunt end first) back
into place along the channel groove.
.
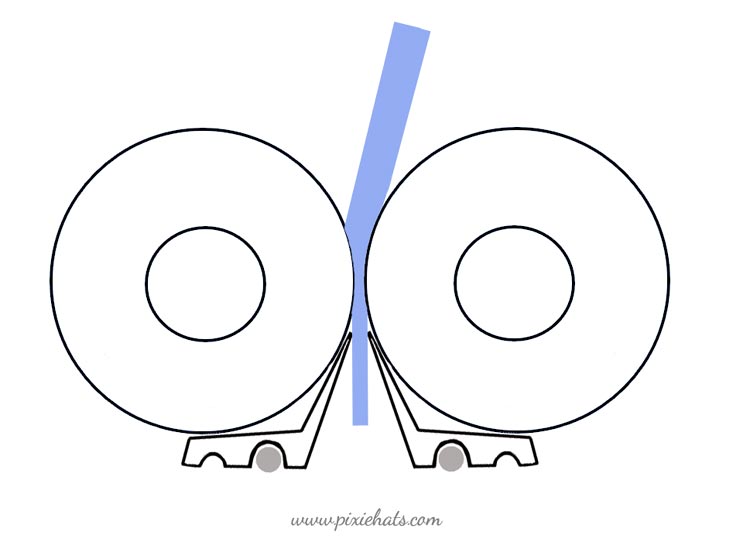
Side view diagram of a pasta
machine's rollers, the scraper blades, support rod ends and a sheetof
clay passing through.
|
Cleaning the scraper blades
frequently will make sure there is no left over dough or clay to harden
off between uses which would otherwise causes excess strain to the scapers
(pretty sure it was clogged resevoirs that snapped mine).
Stripping down the pasta machine
Working with a variety of polymer clay colours means cleaning and
wiping down the blades needs to happen often to prevent streaks from staining
the new colour. It can be easier to do this if the machine is partially striped
of its covers - one side and two top plates, makes inspection of the rollers
& resevoir much more user friendly.
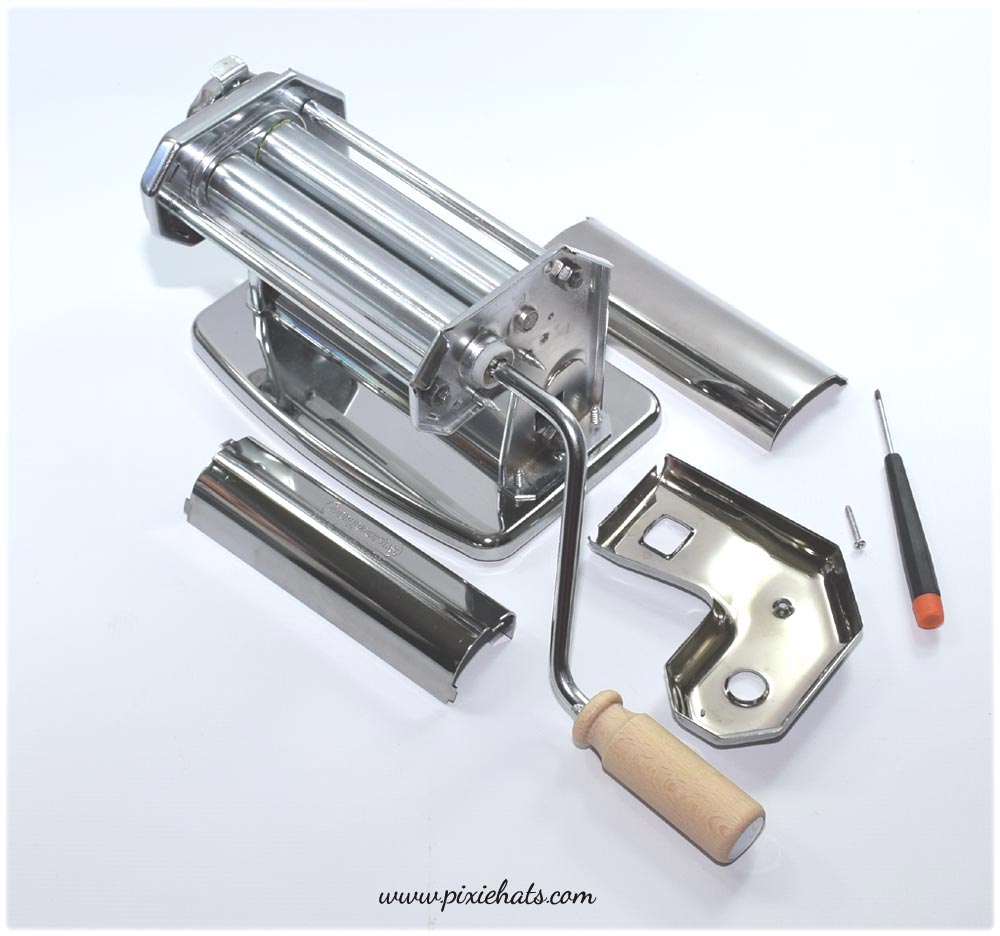
The top rest plates are secured
to the main machine by cut-tails on each end (photo below) and slots in the machine's inner body that the
tails fit into. To remove the plates you'll need to loosen the upper
two nuts found on the handle's side with a 10mm
spanner until enough wriggle room is created for them to be lifted
out.
Removing any screws and nuts on the dial
side of this pasxta machine is a bigger job not explored on this page.
|
|
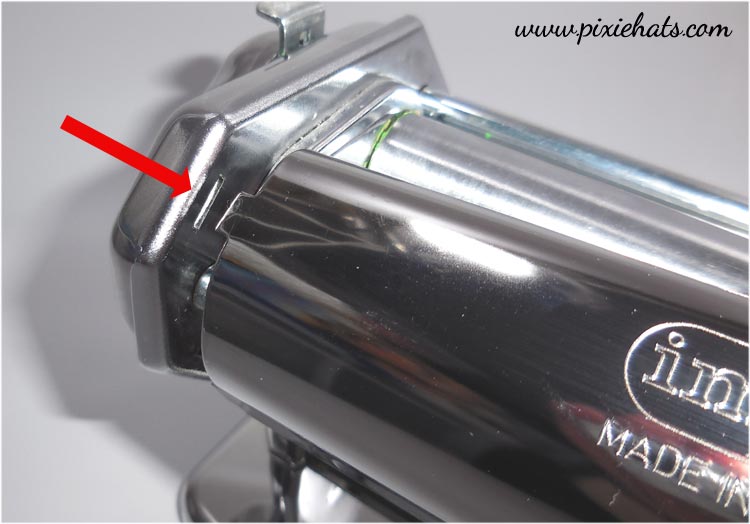
| The
picture below shows one of the slots on the inner side of the machine and
a tail. These slots & tails ensure the plates are held in place whilst
the bars located underneath are fixed in place by nuts at the other end.
|
|
If you
have any questions about any of this please feel free to get in touch.
Happy pasta making.
|
|
|
|
